
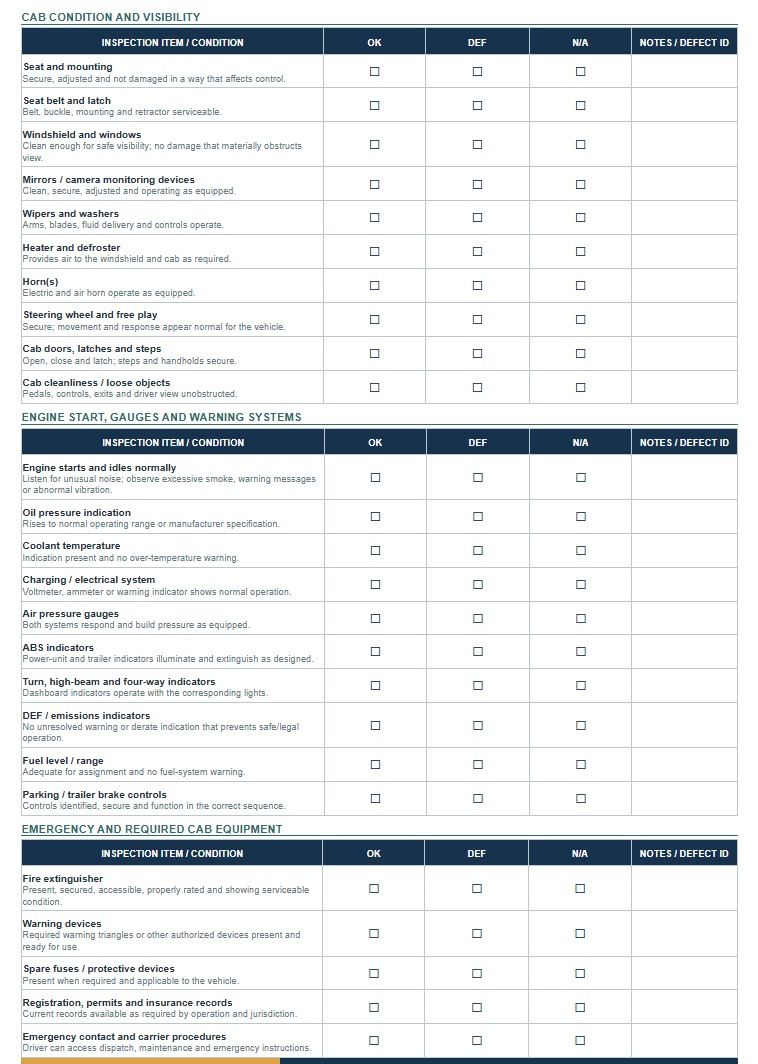
A CDL Pre-Trip Inspection Checklist helps commercial drivers, motor carriers, fleet supervisors, driving instructors, and CDL applicants examine a commercial motor vehicle before operation. The checklist provides a consistent sequence for checking the cab, engine compartment, brakes, steering, suspension, tires, wheels, lights, coupling equipment, trailer components, emergency equipment, cargo securement, and vehicle-specific safety features. It can support daily fleet procedures, driver training, defect reporting, maintenance communication, and preparation for the CDL vehicle inspection skills test. However, a general checklist should be customized for the vehicle class, configuration, endorsements, company policy, and applicable state requirements. This page provides downloadable Word and PDF versions of the CDL Pre-Trip Inspection Checklist, together with practical guidance for completing and using the document.
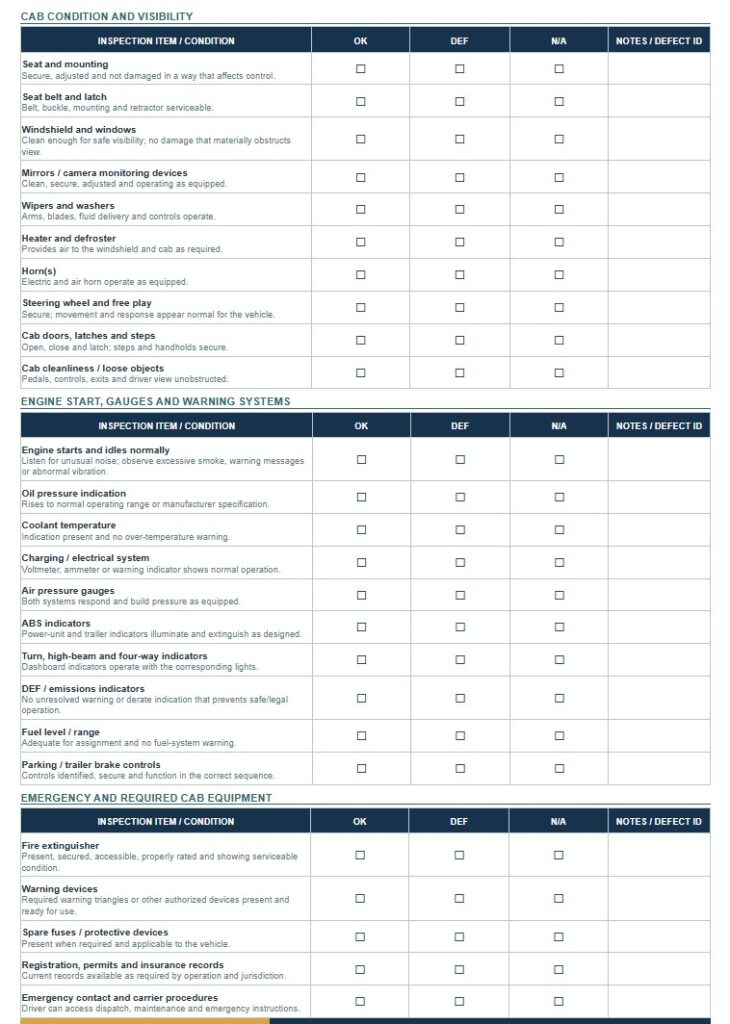
Download the CDL Pre-Trip Inspection Checklist Word Template
The Word format is useful when a driver, motor carrier, training provider, or fleet manager needs to edit the checklist freely before printing, sharing, signing, or adapting it to a tractor-trailer, straight truck, bus, school bus, tanker, or other commercial vehicle.

Download the CDL Pre-Trip Inspection Checklist PDF Template
The PDF format is useful for printing, archiving, sharing, or using a fixed-layout inspection sheet in the cab, dispatch office, maintenance facility, or driver training program.
How to Complete and Use This Document
Begin by identifying the inspection and the equipment being examined. Enter the motor carrier or company name, terminal, inspection date and time, driver’s name, employee or driver identification number, vehicle unit number, license plate, odometer reading, and vehicle type. For combination vehicles, record the tractor, trailer, converter dolly, or additional trailer numbers separately. Include the route, dispatch, load, or work-order reference when required by company procedures.
Before beginning the physical inspection, review the most recent available driver vehicle inspection report and any open maintenance record. Confirm whether previously reported safety defects were corrected or whether the carrier determined that repair was unnecessary. Do not sign a repair acknowledgment unless the required review has actually been completed. A written federal report is not automatically required solely because a pre-trip inspection was performed, but a carrier, state rule, contract, or company safety program may require a documented checklist.
Use the same inspection sequence each time so important components are less likely to be missed. Park on a reasonably level and safe surface, secure the vehicle, set the parking brake, and use wheel chocks when appropriate. Before starting the engine, look for fluid leaks, vehicle lean, visible damage, unsecured components, people, objects, or clearance hazards around the unit.
In the engine compartment, inspect applicable fluid levels, hoses, electrical wiring, belts, air compressor components, steering components, and visible leaks. Check that mounted parts appear secure and that hoses and belts are not visibly cut, frayed, cracked, leaking, or excessively loose. The specific components will differ among diesel, gasoline, electric, hydraulic-brake, and air-brake vehicles, so remove items that do not apply and add manufacturer-specific inspection points when necessary.
Inside the cab, confirm that the seat and seat belt are serviceable and that mirrors are adjusted. Check the windshield, wipers, washers, horn, heater and defroster, gauges, warning indicators, lighting controls, emergency flashers, and other required controls. After starting the engine, monitor oil pressure, charging-system indications, coolant temperature, air pressure, and warning devices as applicable. Perform the correct air-brake or hydraulic-brake checks for the vehicle. Brake testing procedures should follow the current state CDL manual, vehicle configuration, manufacturer guidance, and carrier training because an incomplete or incorrectly sequenced test may fail to identify a serious defect.
During the exterior walk-around, inspect steering linkages, suspension components, brake chambers, hoses, lines, drums or rotors where visible, slack adjusters when applicable, axles, wheels, rims, lug nuts, hubs, seals, and tires. Record cuts, bulges, exposed material, improper inflation, tread concerns, loose hardware, leaks, cracked components, or contact between moving parts. Check headlights, clearance lights, identification lights, turn signals, brake lights, reflectors, reflective tape, license-plate lighting, and required markings.
For combination vehicles, inspect the fifth wheel or coupling device, mounting hardware, locking jaws, release handle, safety latch, kingpin, apron, air lines, electrical connection, glad hands, platform, landing gear, and trailer frame. Confirm that there is no improper gap and that the trailer is securely coupled. Inspect trailer doors, hinges, latches, side panels, roof, undercarriage, rear impact protection, lights, tires, brakes, suspension, and cargo securement. Tank vehicles, doubles, triples, passenger vehicles, and school buses require additional component checks that should be incorporated into the template.
Verify that required emergency equipment is present, accessible, and ready for use. Depending on the vehicle and operation, this may include warning devices, a properly rated fire extinguisher, spare electrical protection devices when required, and other carrier or cargo-specific equipment. Confirm that cargo, tools, hoses, ramps, liftgates, doors, and accessories are secured and do not obstruct the driver’s view or interfere with safe vehicle operation.
Mark each checklist item as satisfactory, defective, not inspected, or not applicable. For every defect, describe the exact component, location, observed condition, and severity. Avoid entries such as “bad tire” or “brake problem.” A useful entry identifies the axle, wheel position, trailer, light, hose, connection, or other affected part. Notify the motor carrier, dispatcher, maintenance department, or responsible supervisor according to company procedure. A vehicle should not be operated when the driver is not satisfied that it is in safe operating condition.
Complete the driver certification, defect-reporting, maintenance-review, and release fields required by the organization. Record the technician, repair date, work-order number, corrective action, and return-to-service authorization when applicable. Retain the checklist according to carrier policy and any applicable recordkeeping rule. This template does not replace a required driver vehicle inspection report, annual periodic inspection, maintenance record, roadside inspection, or official CDL testing document.
For CDL skills-test preparation, use the current manual and instructions issued by the applicant’s state driver licensing agency. States administer the vehicle inspection portion of the CDL skills test and may differ in permitted memory aids, test sequence, terminology, scoring, and vehicle-specific procedures. The checklist should therefore be treated as a customizable study and operational tool, not as a guarantee that every item or phrase will match a particular state examination. Consult the state licensing agency, motor carrier safety department, qualified CDL instructor, maintenance professional, or compliance advisor when requirements are uncertain.