
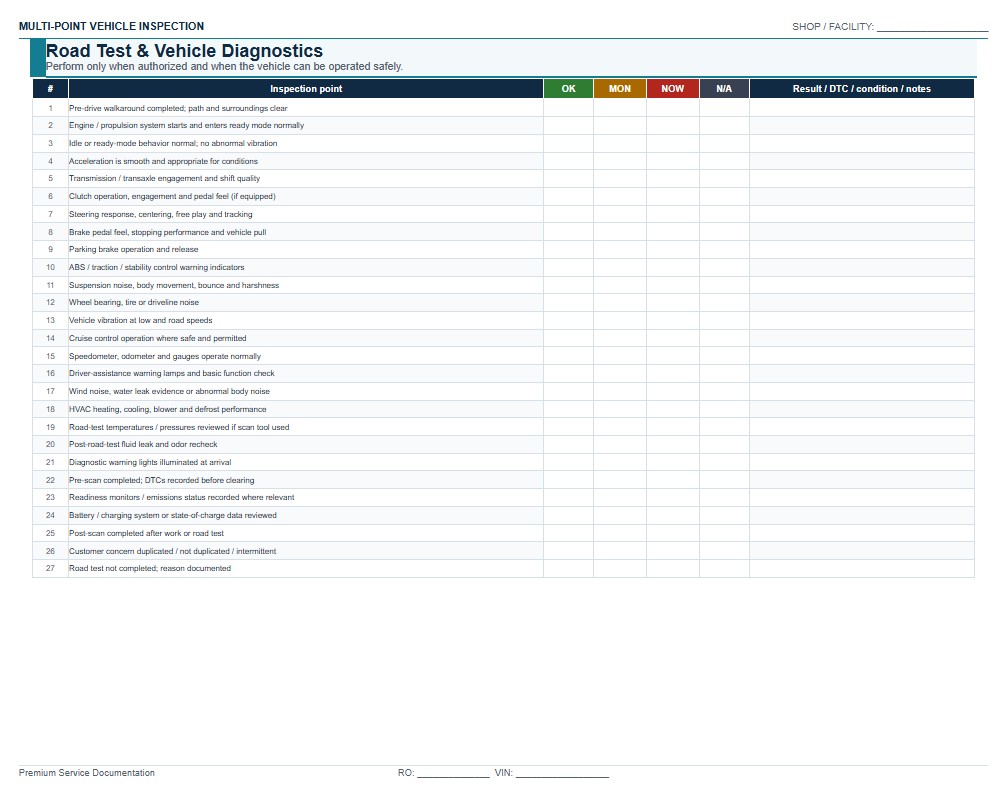
The Multi Point Inspection Checklist is a structured vehicle inspection form used by automotive repair shops, dealerships, fleet departments, mobile mechanics, and vehicle owners to document the visible and measurable condition of a car, light truck, van, hybrid, or electric vehicle. It helps technicians review major systems consistently, record tire and brake measurements, identify maintenance needs, prioritize safety concerns, and communicate recommended repairs to the customer or fleet manager. This page provides downloadable Word, PDF, and Excel versions of the checklist, together with practical guidance for completing and using the document. The editable Word template is suitable for customized inspection reports, the PDF version provides a fixed layout for printing and archiving, and the Excel version supports repeatable records, calculations, status tracking, and inspection history. The checklist should be adapted to the vehicle manufacturer’s specifications, shop procedures, equipment available, and applicable state or local automotive repair requirements.
Download the Multi Point Inspection Checklist Word Template
The Word format is useful when you want to edit the inspection categories, add your repair shop or dealership branding, insert technician instructions, customize status labels, or adapt the document to a particular vehicle type before printing, sharing, signing, or attaching it to a repair order.

Download the Multi Point Inspection Checklist PDF Template
The PDF format is useful for printing, archiving, emailing, or using a consistent fixed-layout inspection report. It can be retained with repair orders, estimates, photographs, customer authorizations, maintenance records, and fleet asset files.
Download the Multi Point Inspection Checklist Excel Template
The Excel format is useful for recording repeatable inspection rows, tire and brake measurements, service dates, odometer readings, estimated repair costs, technician assignments, corrective actions, and vehicle inspection history. It can also support filtering, sorting, calculations, and fleet-level reporting.
How to Complete and Use This Document
Begin by entering the repair facility, dealership, fleet department, or mobile service provider information. Record the inspection date, repair order number, service advisor, technician, customer or department name, and the reason for the inspection. Typical reasons include scheduled maintenance, a pre-purchase evaluation, fleet preventive maintenance, seasonal service, a customer complaint, or an inspection performed before estimating repairs.
Identify the vehicle accurately. Include the year, make, model, vehicle identification number, license plate, odometer reading, engine or powertrain type, and internal fleet unit number when applicable. Record whether the vehicle is gasoline, diesel, hybrid, plug-in hybrid, or battery electric. The exact configuration matters because inspection procedures, fluids, service points, high-voltage precautions, and manufacturer specifications can differ between vehicles that otherwise appear similar.
Use a clear condition legend throughout the checklist. Common categories include satisfactory, monitor, service recommended, immediate attention, and not applicable. Define each status before the form is used so customers, technicians, and managers interpret the results consistently. A status color or check mark should not replace written findings when a defect, measurement, or repair recommendation requires explanation.
Inspect the vehicle exterior and interior systematically. Typical exterior checks include body damage, glass, mirrors, lights, windshield wipers, washer operation, doors, hood, trunk, liftgate, license plates, and visible fluid leaks. Interior checks commonly cover warning indicators, horn, seat belts, heating and air conditioning, parking brake, controls, backup camera, and other safety or convenience equipment. Record whether an item was inspected and describe any abnormal condition.
Document tire information carefully. Enter the tire size, brand, visible condition, inflation pressure, and tread depth for each wheel position, including the spare when present. Note irregular wear, cuts, punctures, bulges, cracking, exposed cords, mismatched tires, damaged wheels, missing valve caps, or tire pressure monitoring system warnings. Compare inflation and replacement specifications with the vehicle placard, owner information, and tire manufacturer guidance. Do not treat the checklist as a substitute for a professional tire evaluation when damage or abnormal wear is found.
Record brake measurements by wheel position whenever the inspection scope and shop equipment permit. Useful fields include brake pad or shoe thickness, rotor or drum condition, brake fluid condition, parking brake operation, hoses, lines, calipers, wheel cylinders, and visible leaks. Measurement limits and replacement recommendations should be based on manufacturer specifications, accepted service information, shop policy, and the actual operating condition of the vehicle. Avoid inserting one universal brake thickness threshold for every make and model.
Continue with the engine compartment, underbody, steering, suspension, drivetrain, exhaust, cooling system, belts, hoses, battery, charging system, and fluids. For hybrid and electric vehicles, include only checks that the technician is trained and equipped to perform. High-voltage components, orange cables, battery enclosures, connectors, and cooling systems may require specialized procedures and personal protective equipment. The form should clearly distinguish a visual inspection from diagnostic testing or disassembly.
Record diagnostic scan results when scanning is included in the service. Identify warning lights, diagnostic trouble codes, monitor status, battery test results, or other measurements without implying that a code alone proves which component has failed. Additional testing may be required before a repair can be recommended accurately. If a road test is performed, document relevant observations such as steering pull, vibration, braking behavior, abnormal noise, transmission operation, or warning indicators. The technician should follow company safety procedures and confirm that the vehicle is safe to operate before road testing.
Use the findings section to describe each problem, its location, supporting measurement, recommended action, and priority. Separate immediate safety concerns from scheduled maintenance and optional services. Estimates should identify parts, labor, taxes, fees, and any diagnostic work according to the repair facility’s procedures and applicable law. State requirements concerning written estimates, customer authorization, replaced parts, disclosures, invoices, storage charges, and repair records vary, so the business should verify the rules that apply in its state, county, or city.
The technician should sign or otherwise authenticate the completed inspection and record the date and time. A service advisor, supervisor, or fleet manager may review the findings before they are presented or approved. Customer acknowledgment should confirm receipt and discussion of the inspection, not automatically state that all recommended repairs were authorized. Repair authorization should be documented separately or clearly identified when required by company procedure or state law.
Attach photographs, diagnostic reports, battery test printouts, alignment readings, estimates, and repair orders when they support the findings. Retain the completed checklist according to the organization’s recordkeeping policy, warranty procedures, insurance requirements, and applicable law. Before finalizing the form, confirm that it matches the vehicle manufacturer’s service information, the technician’s qualifications, the shop’s actual inspection process, and any federal, state, fleet, warranty, or industry-specific requirements.