
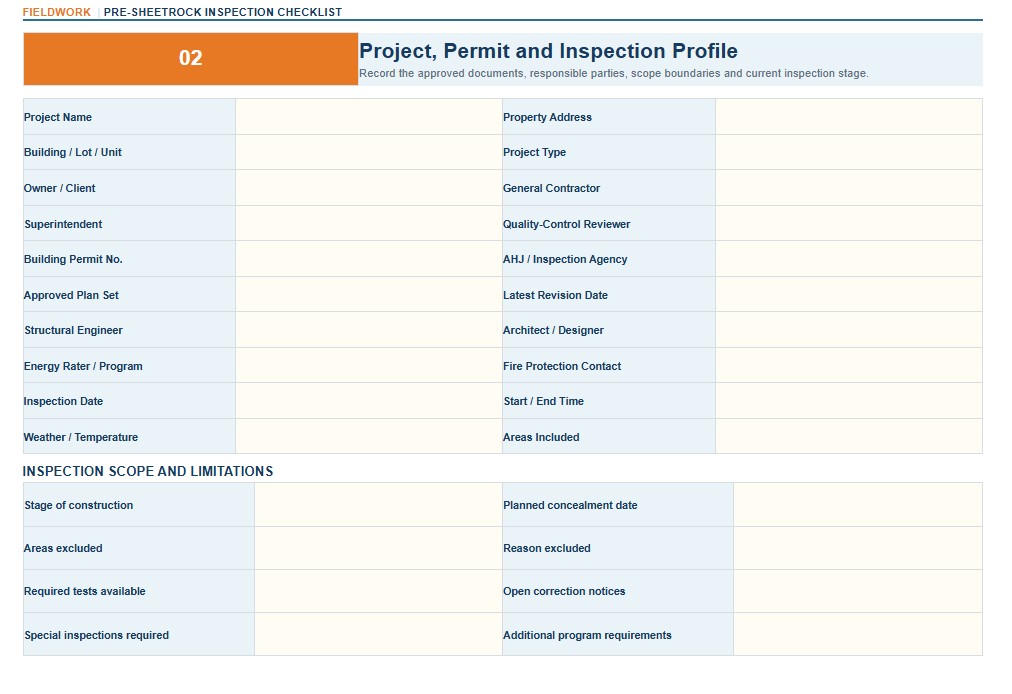
A Pre Sheetrock Inspection Checklist provides a structured way to review construction work before drywall or gypsum board conceals wall cavities, ceilings, framing connections, utility rough-ins, insulation, air-sealing details, and fire-protection components. It can be used by builders, general contractors, project managers, quality-control personnel, homeowners, construction lenders, and independent inspectors to document incomplete work, visible defects, plan deviations, and corrective actions while the affected areas remain accessible. Typical review categories include structural framing, plumbing, electrical, HVAC, fireblocking, draftstopping, insulation, exterior moisture protection, windows, doors, and jobsite readiness. This page provides downloadable Word, PDF, and Excel versions of the Pre Sheetrock Inspection Checklist, together with practical guidance for completing, customizing, and retaining the document. Inspection sequences and approval requirements vary by state and local jurisdiction, so users should verify the applicable permit procedures and obtain required approvals before covering any regulated work.
Download the Pre Sheetrock Inspection Checklist Word Template
The Word format is useful when you want to edit the checklist freely before printing, sharing, signing, or adapting it to a specific home, commercial project, remodeling job, company procedure, approved plan set, or local inspection sequence. You can add project branding, custom trade sections, approval fields, room-specific criteria, and contractor responsibilities.

Download the Pre Sheetrock Inspection Checklist PDF Template
The PDF format is useful for printing, archiving, sharing, or using a fixed-layout version of the document. It can provide a consistent field record for the owner, general contractor, superintendent, subcontractors, private inspector, lender, and project file.
Download the Pre Sheetrock Inspection Checklist Excel Template
The Excel format is useful when the inspection contains repeatable rows for rooms, floors, units, trade systems, deficiencies, photographs, responsible contractors, correction dates, and reinspection results. It can also help track open items across multiple homes, buildings, phases, or construction lots.
How to Complete and Use This Document
Begin by entering the project name, property address, building or unit number, permit number, inspection date, approved plan revision, general contractor, superintendent, and person completing the checklist. Identify whether the review applies to an entire building, one floor, a specific unit, an addition, or selected rooms. Record the authority having jurisdiction and the applicable inspection stage because terms such as framing inspection, rough-in inspection, insulation inspection, all-frame-and-rough inspection, and pre-drywall inspection are not used identically in every jurisdiction.
Complete the inspection while wall and ceiling cavities remain open and all relevant work is visible. Do not install drywall merely because an internal checklist has been completed. Many building departments require separate or combined approvals for framing, rough electrical, plumbing, mechanical, fire sprinkler, fire alarm, insulation, or other concealed work. Confirm which inspections must be approved before insulation or drywall is installed. Keep the permit card, approved construction documents, truss drawings, engineering details, product approvals, and authorized field revisions available when required.
Review structural framing against the approved plans. Check studs, plates, joists, beams, headers, columns, rafters, trusses, hangers, hold-downs, anchors, blocking, bracing, shear walls, and load paths. Record damaged or excessively altered framing, missing connectors, improper bearing, unsupported openings, unapproved notches or holes, loose fasteners, and field modifications to engineered components. Trusses, engineered joists, beams, and structural panels should not be cut, drilled, repaired, or altered without appropriate manufacturer or design-professional documentation.
Examine fireblocking, draftstopping, concealed spaces, rated assemblies, and penetrations. Note missing blocks, open chases, unsealed penetrations, improper recessed boxes, incomplete shaft construction, and materials that do not correspond with the approved assembly. Requirements depend on building type, occupancy, local code adoption, and the approved plans. Questions involving fire-resistance ratings, multifamily separations, shafts, garages, or commercial construction should be referred to the building or fire inspector and the responsible design professional.
Verify that plumbing, mechanical, and electrical rough-ins are substantially complete and have received any required trade approvals. Plumbing observations may include supply and drain piping, vents, supports, pressure or leak-test status, shower or tub assemblies, cleanouts, nail plates, and protection from freezing or physical damage. Mechanical observations may include ducts, boots, equipment clearances, exhaust routes, combustion-air provisions, refrigerant lines, condensate piping, dampers, and sealed duct connections. Electrical observations may include boxes, cables, raceways, panel locations, conductor protection, grounding and bonding provisions, required circuits, smoke-alarm wiring, and nail plates at vulnerable framing penetrations.
Inspect windows, exterior doors, wall penetrations, sheathing, weather-resistive barriers, flashing, and visible water-management details before interior finishes restrict access. Record signs of active moisture, wet framing, roof leakage, damaged sheathing, missing flashing, or improperly sealed penetrations. Drywall should not conceal wet materials or unresolved water intrusion. Moisture concerns may require measurement, drying, repair, or evaluation by an appropriate contractor before work continues.
When insulation and air-sealing are included at this inspection stage, document insulation type, intended R-value, placement, coverage, compression, gaps, alignment with the air barrier, and treatment around wiring, piping, exterior walls, rim areas, attic access points, and penetrations. Verify that required air-sealing work is visible and complete before it becomes inaccessible. Energy-code documentation, approved compliance reports, manufacturer instructions, and program-specific requirements should control the final acceptance criteria.
Use a consistent location system for every observation, such as floor, room, wall direction, framing bay, panel, circuit, or photograph number. Mark each item as acceptable, correction required, not applicable, or not verified. For every deficiency, describe the visible condition, exact location, relevant drawing or specification when confirmed, immediate action, responsible contractor, target correction date, and reinspection result. Avoid unsupported statements that work violates a particular code section unless the applicable requirement has been verified.
Take dated photographs of concealed framing, utility routes, blocking, backing, piping, wiring, ductwork, firestopping, and corrected defects. These images can assist with future repairs, remodeling, warranty questions, and damage investigations. Store them using file names that connect each photograph to the checklist, room, and inspection date.
The person completing the checklist should sign and date the record, and the superintendent or project manager should review unresolved items. Subcontractors should document completed corrections, and a follow-up review should confirm closure before covering the work. This checklist is a quality-control tool and does not replace an official inspection, licensed trade responsibility, engineering review, manufacturer instructions, or approval from the authority having jurisdiction. Consult the local building department, licensed contractor, architect, engineer, energy rater, fire-protection professional, or qualified inspector whenever the required inspection sequence, structural modification, moisture condition, rated assembly, system test, or concealment approval is uncertain.