
An RV De-Winterization Checklist provides a structured process for returning a motorhome, travel trailer, fifth wheel, camper van, truck camper, or toy hauler to service after seasonal storage. RV owners, rental operators, dealers, storage facilities, and service technicians can use the checklist to document plumbing restoration, antifreeze removal, fresh-water sanitation, battery reconnection, appliance testing, tire inspection, exterior checks, and corrective actions. A detailed record helps prevent water-heater damage, hidden plumbing leaks, contaminated water, discharged batteries, unsafe tires, appliance faults, and overlooked storage damage. This page provides downloadable Word, PDF, and Excel versions of the RV De-Winterization Checklist, together with practical guidance for completing and using the document. The Word version supports customization, the PDF version provides a consistent printable record, and the Excel version is useful for tracking tasks, measurements, dates, costs, technicians, test results, photographs, parts, repairs, and final return-to-service approval.
Download the RV De-Winterization Checklist Word Template
The Word format is useful when an RV owner, technician, dealer, rental operator, or fleet manager wants to edit the checklist freely before printing, sharing, signing, or adapting it to a specific RV model, plumbing layout, appliance configuration, storage method, or company procedure.

Download the RV De-Winterization Checklist PDF Template
The PDF format is useful for printing, archiving, sharing, or keeping a fixed-layout de-winterization record with the RV manuals, service history, warranty documents, repair invoices, and seasonal maintenance records.
Download the RV De-Winterization Checklist Excel Template
The Excel format is useful for tracking repeatable startup tasks, plumbing fixtures, battery readings, tire pressures, appliance tests, service dates, parts, dollar amounts, responsible technicians, corrective actions, completion status, and maintenance history for one or more recreational vehicles.
How to Complete and Use This Document
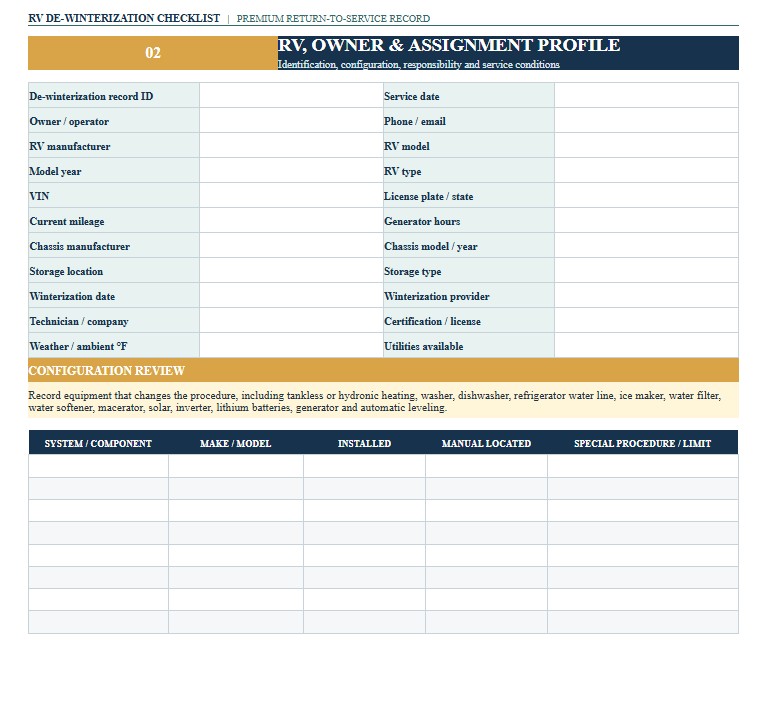
Begin by identifying the recreational vehicle and the de-winterization assignment. Enter the manufacturer, model, model year, RV type, vehicle identification number, license plate, mileage, generator hours, owner or operator, storage location, inspection date, and person responsible for the work. Record the winterization method previously used, such as compressed air, non-toxic RV antifreeze, a combined method, or professional service. Attach or reference the completed winterization record when available.
Review the current owner manual and the instructions for the exact water heater, water pump, refrigerator, ice maker, washing machine, dishwasher, hydronic system, generator, batteries, chassis, and other installed equipment. Valve positions, filters, drain plugs, bypass arrangements, and recommissioning procedures vary among RVs. Do not rely solely on a generic sequence when the manufacturer provides model-specific instructions.
Inspect the RV before reconnecting utilities. Check the roof, sealants, windows, doors, slide-outs, storage compartments, underbody, tires, batteries, plumbing areas, and interior surfaces for leaks, pests, corrosion, damaged wiring, cracked fittings, soft materials, or moisture staining. Record every problem with its location, severity, photograph reference, recommended action, and responsible person. Address active leaks and safety-critical defects before pressurizing or operating affected systems.
Restore the potable-water system carefully. Confirm that low-point drains, tank drains, water-heater components, filter housings, bypass valves, and winterization valves are returned to the correct service positions. Reinstall drain plugs, anodes, filters, or other removed components only according to the applicable instructions. Never energize a tank-style water heater until it has been filled and verified to contain water.
Connect an approved potable-water source or fill the fresh-water tank, then flush the system according to the manufacturer’s procedure. Operate each cold and hot fixture separately, including kitchen and bathroom faucets, shower, toilet, outside shower, spray ports, and auxiliary sinks. Include refrigerator water lines, ice makers, washing machines, dishwashers, filters, water softeners, tankless heaters, hydronic systems, and other installed equipment only under their specific instructions.
Document whether winterization fluid, odor, discoloration, air, sediment, or abnormal flow remains at any outlet. Record water-pump operation, city-water performance, pressure behavior, and any unusual pump cycling. Inspect accessible pipes, fittings, valves, drains, traps, tanks, toilet seals, water-heater connections, and appliance supply lines while the system is pressurized. A pump that cycles when no fixture is open may indicate a leak or pressure-loss condition that requires investigation.
Sanitize the fresh-water tank and potable-water system when required by the RV manufacturer, maintenance plan, storage history, water quality, or operating conditions. Use only products and concentrations approved for the system. Record the sanitizing product, quantity, contact period, flushing procedure, date, and person who completed the work. Do not assume that flushing out visible antifreeze alone establishes that the potable-water system is sanitary.
Inspect and reconnect batteries according to their chemistry and manufacturer instructions. Record battery type, voltage or state of charge, terminal condition, charger settings, disconnect position, solar-controller status, and any low-temperature limitations. Flooded lead-acid, AGM, gel, and lithium batteries can require different procedures. Damaged, swollen, leaking, overheated, or severely discharged batteries should be evaluated by a qualified professional.
For motorized RVs, inspect chassis fluids, belts, hoses, batteries, brakes, steering, warning indicators, lights, mirrors, windshield equipment, and tires before driving. For towable RVs, inspect the coupler or fifth wheel, safety chains, breakaway system, connector, brakes, landing gear, suspension, and hitch equipment. Record cold tire pressure, visible condition, size, load range, and DOT date code for every tire, including the spare.
Restore propane service only after checking the visible condition of cylinders or tanks, mounting, pigtails, regulator protection, appliance controls, compartment ventilation, and detector status. Do not use an open flame to locate a leak. Suspected leaks, regulator problems, damaged components, pressure testing, or combustion concerns should be referred to a qualified RV or propane service professional.
Test the refrigerator, furnace, water heater, air conditioners, generator, range, oven, microwave, ventilation fans, slide-outs, leveling system, awnings, alarms, and optional equipment under safe operating conditions. Record the energy source, test duration, measurements, fault codes, result, and corrective action. Operate engines and generators only where exhaust can disperse safely.
Finish the document with unresolved findings, completed repairs, invoices, parts used, photographs, recall checks, technician information, owner acknowledgment, and final release status. Retain the checklist with the winterization record, manuals, warranties, service history, and supporting documents. Registration, inspection, emissions, storage, rental, and road-use requirements vary by state and sometimes by county or city. Consult the applicable authority and qualified RV, chassis, tire, electrical, propane, battery, or appliance professional whenever specialized testing, safety-critical repair, warranty work, or uncertain equipment procedures are involved.